
Oh and another thing, I’m not really sure what these are called, fondant figures or fondant figurines? Gumpaste figures or gumpaste figurines? Oh well, since we already have a tutorial for a little girl somewhere in this blog, and now there is one for a fondant little boy, might as well call them fondant people (or gumpaste people) 🙂
Okay, so enough of the babble! Here it is!
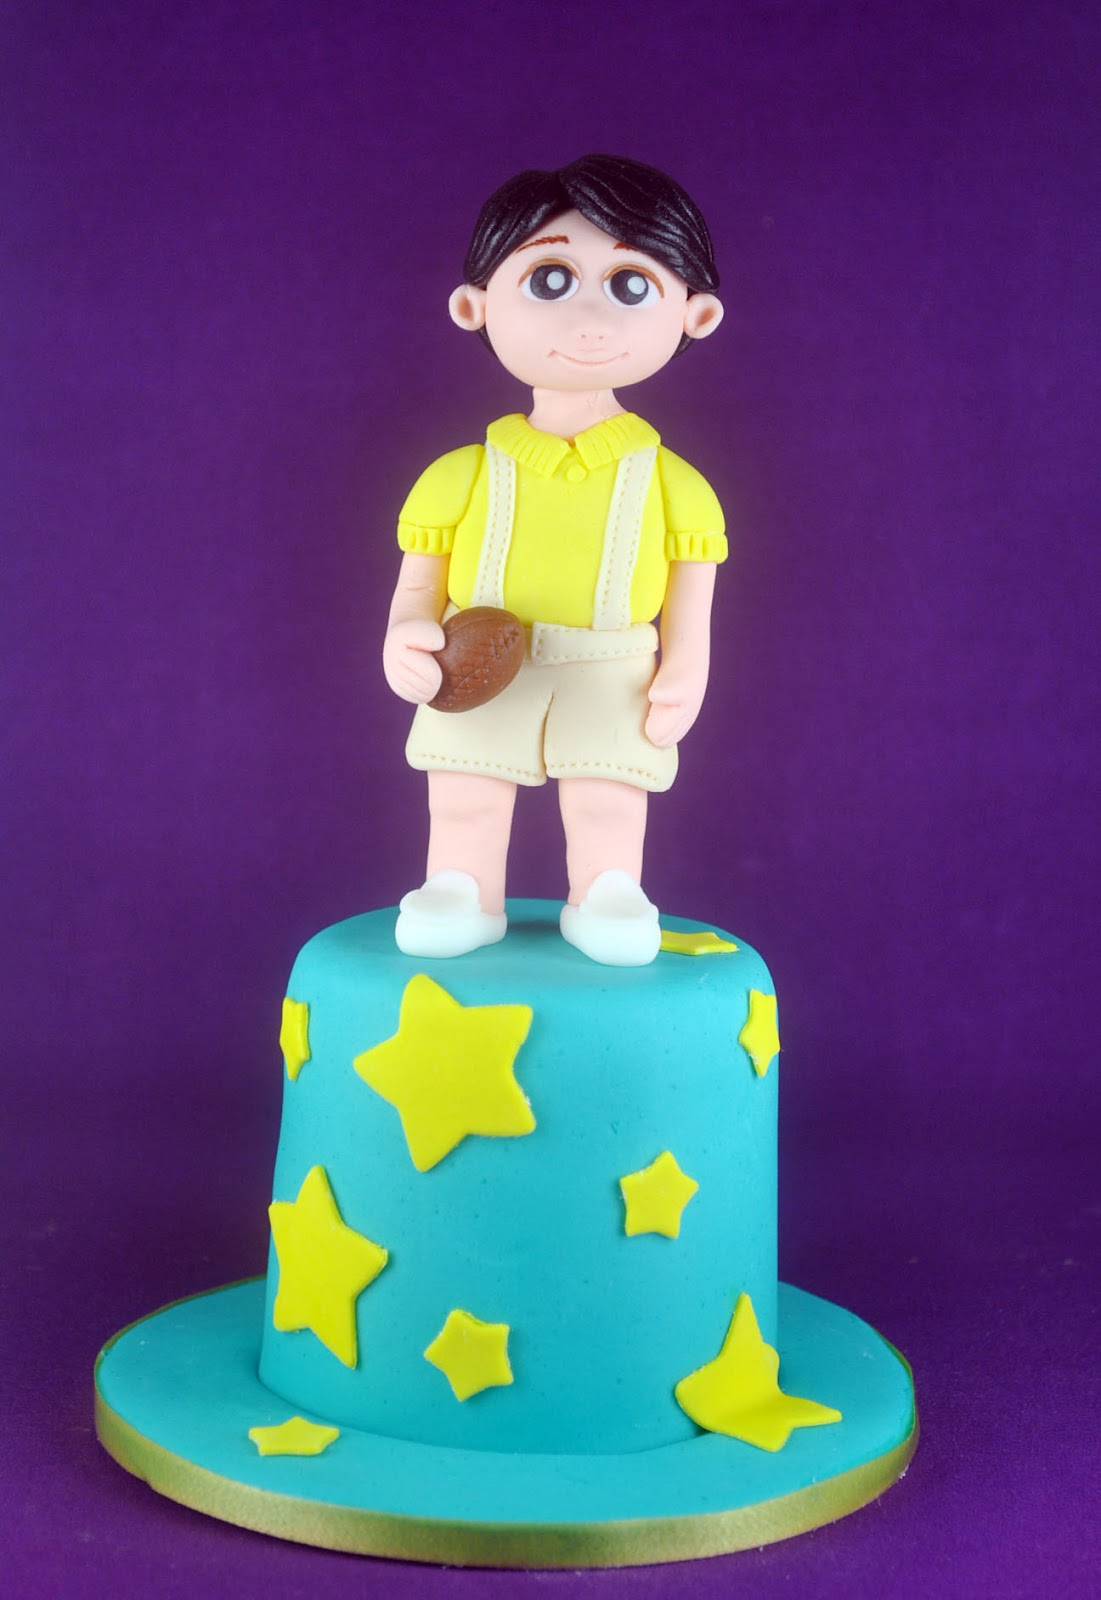
Fondant Figures Step by Step Tutorial – Little Boy
What we need:
Fondant in flesh, black, white, brown, yellow and ivory
Fondant tools
Ball tools
Knife
Rolling Pin
Stitching Tool
Small piping tip #3
Buckeye brown food color
Small fine brush for details like eye brows and eye lashes
Brush and water to glue things up

Here’s how:
(1) Get some ivory fondant, roll into a thick short rope
(2) Curl it into a letter “C”
(3) Cut the rounded ends
(4) Press ball tool into the “shorts” to create a cavity where we can place the legs later.

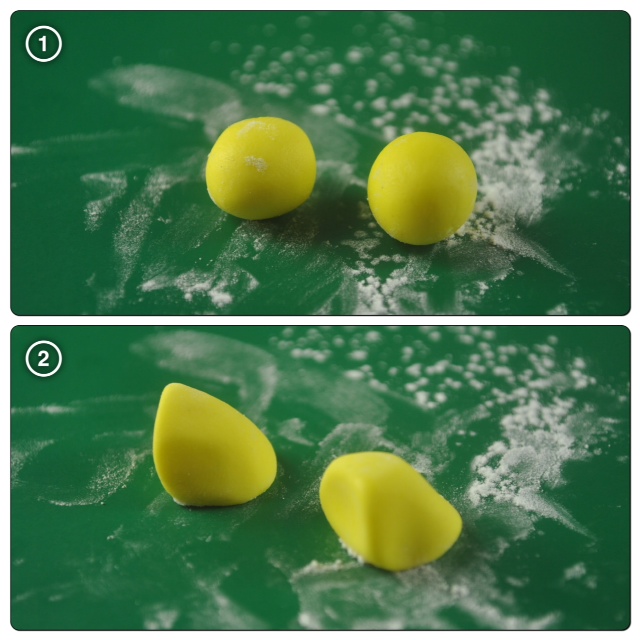
(5) Get some yellow fondant, roll into a ball.
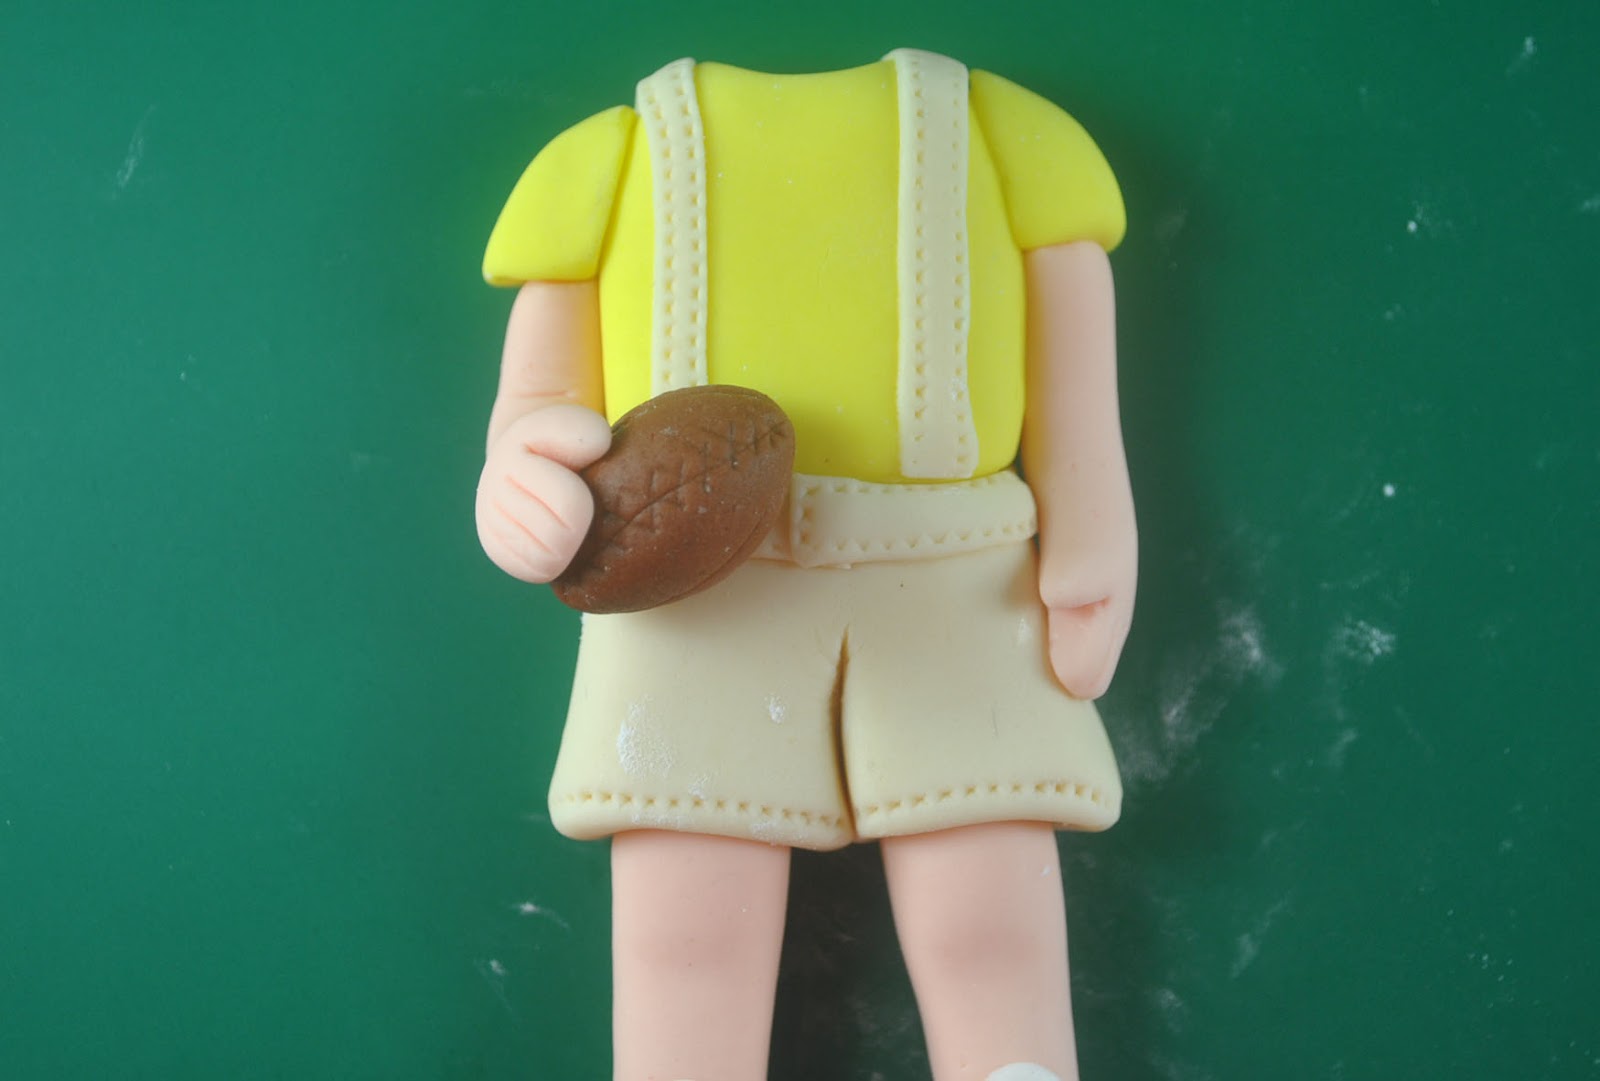
(6) Then into an oval shape and attach to the shorts
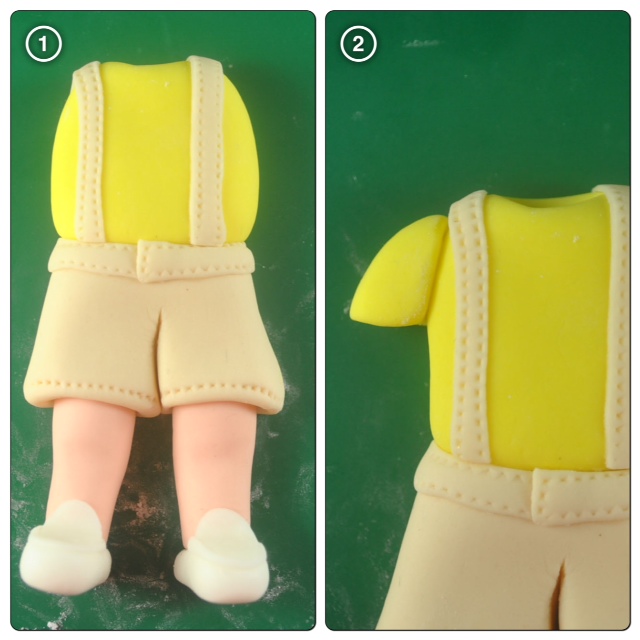
(7) Add some details onto the short like a belt
(8) And some straps on the yellow shirt 🙂

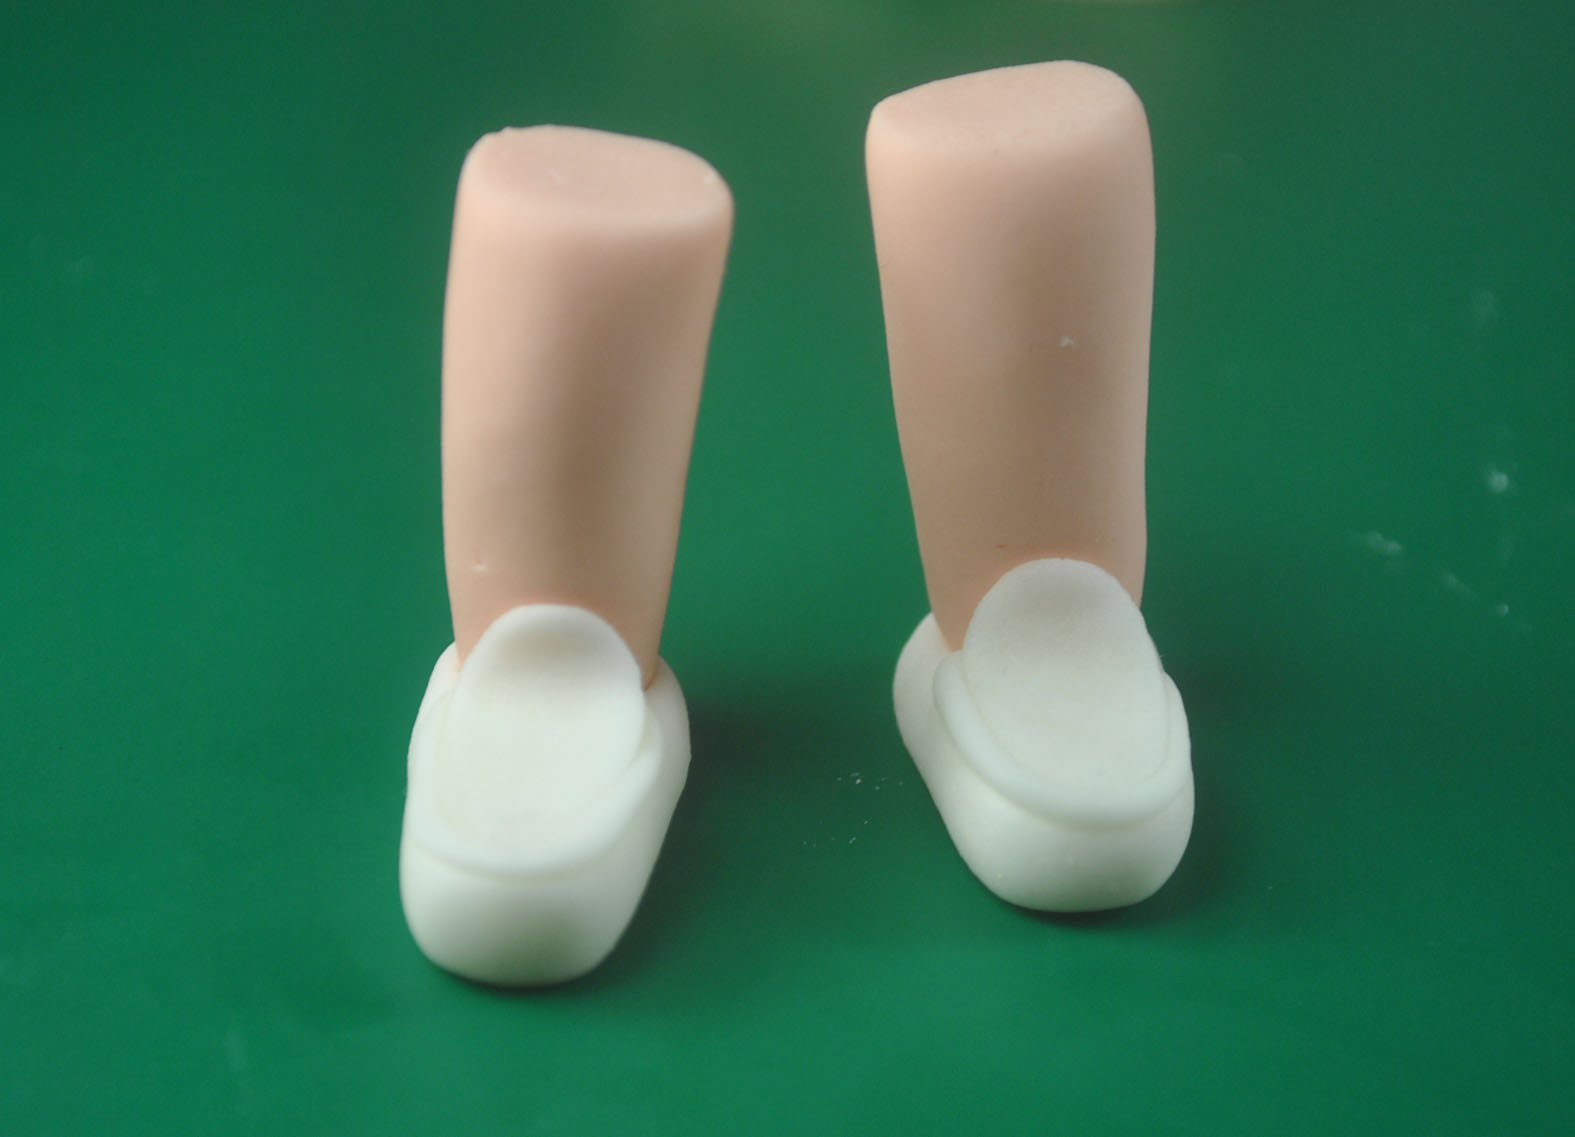
(9) Now for the legs, just easy. Just roll flesh fondant into two cylinders.

(10) Make the shoes roll two white small fondants into balls. Flatten into tear shapes. Squeeze the middle part inward, just slightly – enough to make a noticeable dent
(11) Press a ball tool on the narrower end.
(12) Roll white fondant thinly, cut 2 oval shapes. Attach to the shoes.
(13) Roll some white rope fondant on the edges.

(14) It’s coming along now! Yey! Here’s a pic of attaching the legs to the shoes.
(15) For the sleeves, roll two small balls from the yellow fondant.
(16) Then roll into tear shapes. Flatten the base.
(17) Attach the legs to the shorts.
(18) Attach sleeves to the sides of the little boy’s top
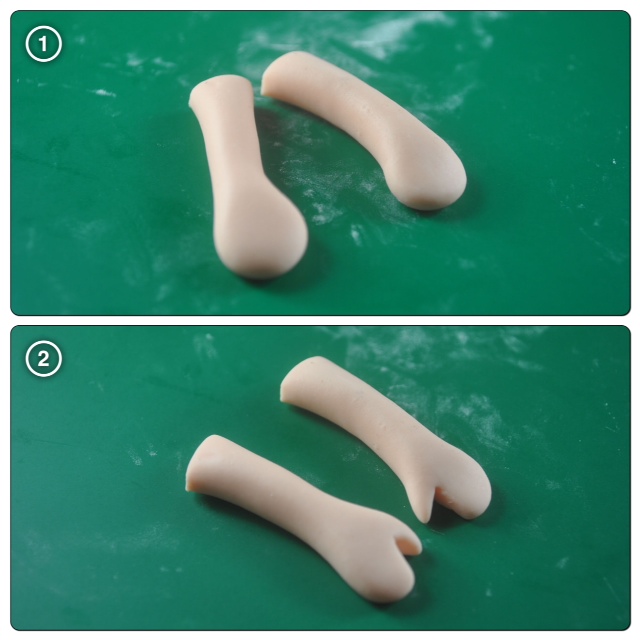
(19) To make the hands, roll flesh fondant into a cylinder – a long cylinder. Press one end (leaving just a small part) back and forth to create a dent all around
(20) Flatten the round part and cut a “v” at one side. Rub the “hands” to soften cut edges. Press knife into the the fondant to create the fingers. Now, do the other hand.
(21) Attach to the sides of the little boy’s shirt. At this point, I added a ball to liven things up.
(22) And now we come to the most interesting part, the face.
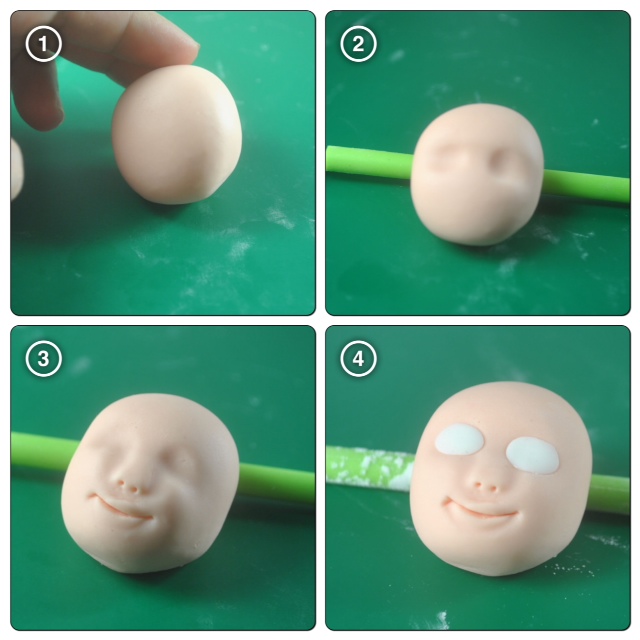
(23) It’s actually the same step as the cupcake faces tutorial here. So go ahead and read up on it. But please come back, yeah?

(24) For the hair, roll some black fondant into a ball. Flatten it up.
(25) Attach to the figure’s head.
(26) Add some bangs
(27) Run the knife through the hair to add some details.

(28) Add some fondant for the neck and attach the head to the body.

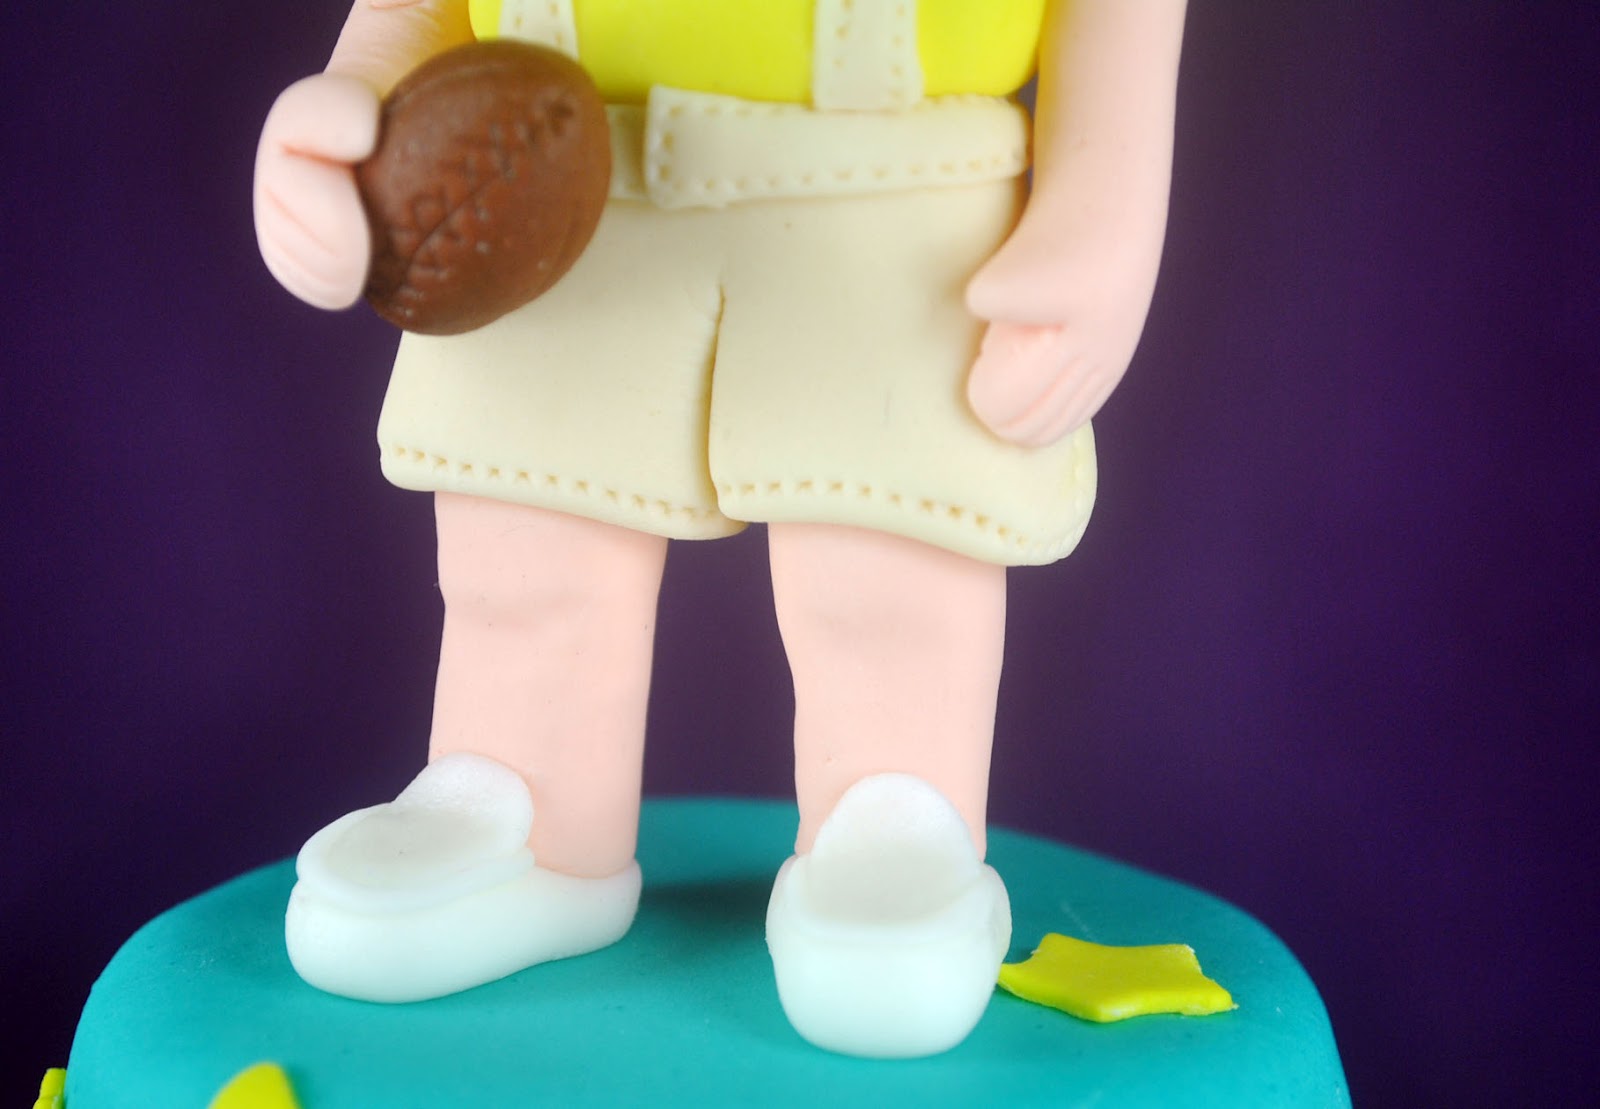
Here’s a close-up on some of the details.
Hmmm… I wonder what comes next after a tutorial for fondant figures for little boy and little girl? 🙂 What do you think? Any requests? 🙂
BACK To HOW TO Fondant Figures